Suppose you’ve been taking pictures with your digital camera for a while, and you’re wondering why some of your pictures look so much better than others. Or suppose you’ve noticed that somebody else’s pictures look a lot better than yours, and you’ve decided it’s time for you to do something about it. What should you learn? Well, if you’re a beginner, it’s very likely that you need to learn to understand exposure better.
This article is my attempt to teach somebody who is in the habit of letting the camera set the exposure how to take control of it themselves. I hope this will get you started with the basics. There is immensely more to be learned, but I’m not qualified to teach it all, and you don’t want to try to learn it all at once anyway, it’d just bury you in details. If this gets you started, I’ve done my job, and you’ll be able to understand more advanced articles on exposure when you’re ready for them.
These instructions are for digital cameras. The meaning of setting an ISO differs between digital cameras and film cameras; the other two are the same.
Despite common usage, you should remember that exposure is a matter of opinion. There is no objective “right” or “wrong”; there is only “what you want” and “not what you want”. The purpose of taking control of your exposures is to be able to get “what you want” more often.
There are three controls on your camera that affect exposure: shutter speed, aperture, and ISO. Each of these things affects both the exposure and one other aspect of the picture. Often getting the picture you want is a matter of balancing different effects to get a compromise you can live with.
Shutter Speed
What’s a shutter? It’s a thing for controlling whether light is allowed in or not. People used to have them over the windows on their houses. Now they’re frequently built into lenses (leaf shutters) or camera bodies (focal-plane shutters), and used to control photographic exposures.
Shutter speed is simple: it’s how long the shutter is open, meaning how long the sensor is exposed to the light. Shutter speeds are generally expressed in fractions of a second, like 1/30 sec., 1/60, 1/125, 1/250, 1/500, 1/1000. Longer exposures make the picture brighter (1/30 sec. is longer than 1/1000 sec., okay?); shorter exposures make the picture darker.
Shutter speed also affects how anything moving is shown—if it moves significantly during the time the shutter is open, it will be blurred in the picture. More movement, more blur.
Aperture
Aperture is weird. Well, it’s simple—it’s how much light the lens lets through (traditionally controlled by a variable-size aperture in the lens).
The units aperture is measured in are weird, though. They’re called “f/stops”. Traditional f numbers include f/2, f/2.8, f/4, f/5.6, f/8, f/11, f/16, f/22. The smaller numbers (2.8 is smaller than 16) represent larger apertures, meaning they let more light through. Larger apertures make the picture brighter, and smaller apertures make the picture darker. Mostly photographers talk about aperture, rather than f/number—that is, we say “stop down to f/8” meaning make the aperture smaller, or “open up to f/2.8” meaning make the aperture larger.
Notice that entires in the sequence of f numbers differ by a factor of 1.4 (this is most obvious in the step from f/2 to f/2.8). If any of you are wondering if that “1.4” is really the square root of two, the answer is yes. If you weren’t wondering, never mind, it doesn’t matter.
Aperture also affects depth of field (the zone around where you focused that’s still acceptably sharp). Smaller apertures give you more depth of field, larger apertures give you less. With a very fast f/1.4 lens, focused close (say 2 feet), your depth of field can be less than inch, so focusing can become very important! (Technical and practical details of depth of field could provide material for several articles all by themselves.)
One of the two major technical properties of a lens is its maximum aperture—the most light it can let in. A lens that gathers a lot of light (meaning it has a large maximum aperture) is called a “fast” lens. A 50mm f/1.4 is a common example of a fast lens. (The other major property is its focal length, which in combination with the sensor size determines the angle of view of the pictures it takes. These days many lenses are “zoom” lenses, meaning the focal length can be adjusted throughout some range.)
ISO
ISO measures how sensitive your sensor is to light. Bigger numbers mean more sensitive, so a higher ISO makes the picture lighter, and a lower ISO makes the picture darker. Your camera always produces its best pictures at the lowest ISO it supports. Higher ISOs introduce gradually increasing amounts of visual noise (like spots of salt and pepper, maybe in color, shaken all over the picture), especially in the darker areas.
Stops
There’s one additional weird usage you’ll need to understand when talking with photographers. We talk about “one f/stop” or just “a stop” to mean a change in the amount of exposure by a factor of 2. So I might describe a picture as “underexposed a stop”, meaning I think it needs twice as much light. There are three different settings that affect the exposure, but making a one stop change with any of them makes exactly the same change to the brightness of the picture.
With shutter speeds, this is easy: leaving the shutter open twice as long lets in twice as much light, of course. Notice that that sequence of shutter speeds I gave above differ by factors of two. This is not an accident. Those are standard shutter speeds because they’re one stop apart (and we’ll just ignore that jump from 1/60 to 1/125; it’s very close to one stop).
With apertures, changing the exposure by one stop is easy too—if you’ve memorized the arcane series of numbers. Those numbers I gave above aren’t arbitrary; f/4 is one stop smaller than f/2.8, f/5.6 is one stop smaller than f/4. But you don’t really have to memorize it; just figure out how the aperture control on your camera works. Your manual aperture control probably adjusts the aperture in either ½ stop or 1/3 stop increments. Find out which, and then you can just move the control two or three steps to get a one stop change, without having to know the exact numbers.
Finally, it’s easy with ISO, too. Doubling the ISO (say, going from ISO 200 to ISO 400) makes the pictures one stop brighter. Making the ISO number smaller makes the picture darker.
Equivalent Exposures
So, when you want to decrease exposure by one stop, there are three different ways to do it: Cut the ISO in half, cut the shutter speed in half, or stop down one f/stop. When you want to increase exposure by one stop, there are three different ways to do it: double the ISO, double the shutter speed, or open up by one f/stop.
If you simultaneously cut the shutter speed in half (decreasing exposure by one stop) and open up one f/stop (increasing exposure by one stop), the net effect is nothing—the image will look just the same. Well, almost the same; the secondary effects, of shutter speed on motion blur and of aperture on depth of field, will cause small differences, but the brightness will be the same. This is very useful to remember when you want to adjust one of the secondary effects without changing the exposure.
Varying Shutter Speed
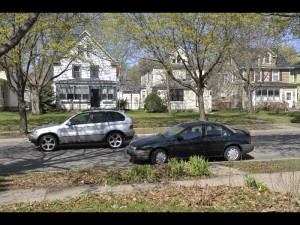
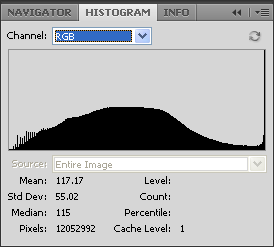
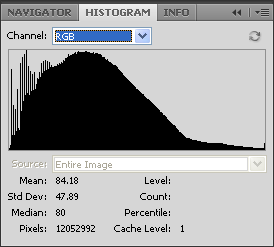
So, let’s make some images and look at them. Since I’ve advised that you look at image histograms, I’m going to show them here too (the examples were captured out of Photoshop CS4), and describe what they’re telling us.
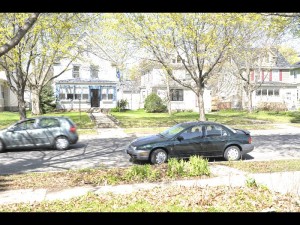
Here’s a sequence from severe overexposure to severe underexposure shot at f/5.6, just by varying the shutter speed.
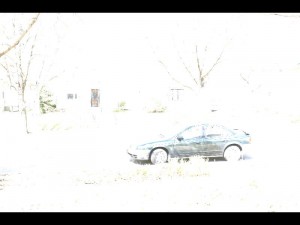
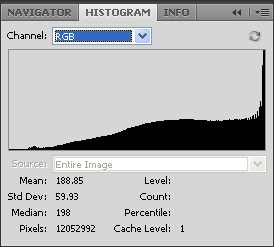
1/15 sec. f/5.6
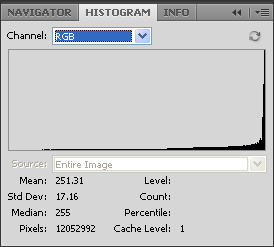
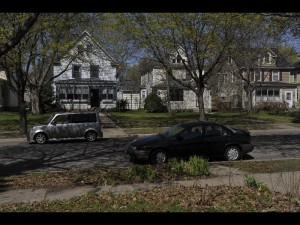
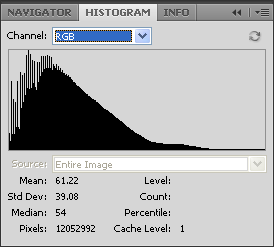
This is severely overexposed by conventional standards. Lots of things we could see with our eyes are pushed up to pure white in this rendering. The histogram shows a lot of pixels at pure white (that very narrow spike at the right end), and then a bunch more just one lower, and a bunch more one lower, and then a very long tail with not much in it, and nothing at all in the left-hand 1/8 of the range—there are no black or very dark pixels in this image at all.
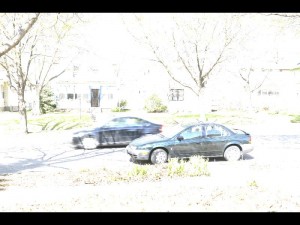
1/30 sec. f/5.6
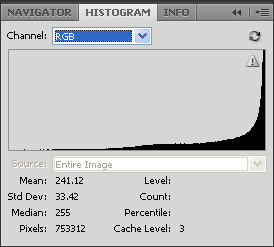
At one stop less exposure, this is still quite severely overexposed, but look how much more detail has appeared. The histogram is at least easier to see, with some pixels through the upper half of the range, but there’s still a very high spike at the right end.
Also, note the blur in the moving car. The speed limit on that street is 30, and it’s going directly across the field of view (worst case for motion blur); 1/30 sec. is nowhere close to fast enough to freeze it, but the blur is small enough that it wouldn’t do if I wanted it deliberately to indicate motion.
1/60 sec. f/5.6
Another stop less, and this starting to look merely badly overexposed. The histogram shows more pixels in the midtones, and a very few making it all the way to black.
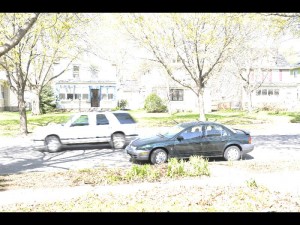
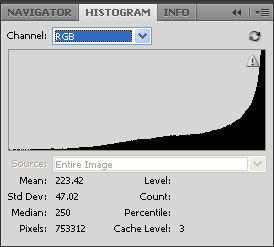
1/125 sec. f/5.6
Still overexposed! And the passing car is still significantly blurred.
1/250 sec. f/5.6
We’re starting to show a conventional histogram with a hump in the middle, but there’s still quite a pile-up at the high end, indicating clipped highlights.
The passing car is slightly unsharp from motion blur (more visible in the full-size image, click the thumbnail to see).
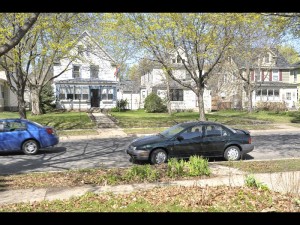
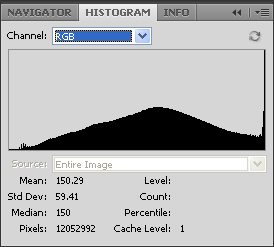
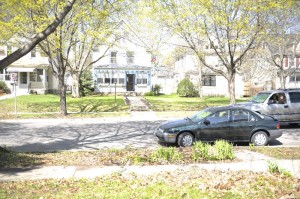
1/500 sec. f/5.6
This is the exposure the light meter in my D700 indicated (matrix metering mode). It looks about right to the eye, but close examination (or a quick glance at the histogram) will show that it’s still clipping highlights.
The passing car is on the hairy edge of being sharp, but not quite, yet.
1/1000 sec. f/5.6
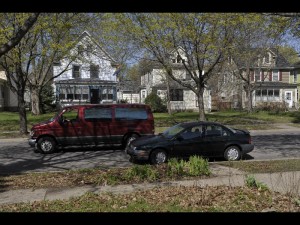
This is clearly a bit too dark, but looking at the histogram shows we’re not clipping either highlights or shadows, so this could be adjusted to any brightness we liked.
And the moving vehicle (the van) is finally sharp, too, even the tires (the top of the tire is moving twice as fast as the van is).
1/2000 sec. f/5.6
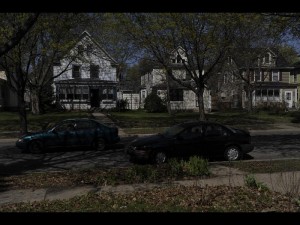
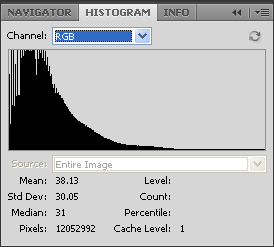
Finally, we’re getting clearly underexposed. The moving car is sure sharp, though, even the spinning wheels. There’s just a little clipping at the dark end, and it’s likely that this exposure could be restored to look very good.
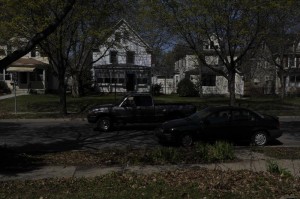
1/4000 sec. f/5.6
We’re now seeing quite extensive clipping on the black end, and a general pileup of pixels in the lower values. While a recognizable picture could be recovered from this, it’s unlikely it would ever look really good.
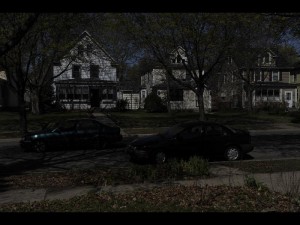
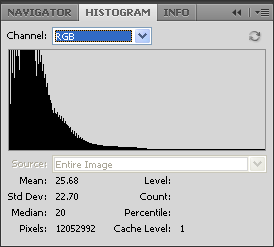
1/8000 sec. f/5.6
Even more clipping on the black end, and more tone compression. This is 4½, or some such, stops underexposed, and we could still recover much of the image.
Varying Aperture
Rather than repeating the whole sequence, I’m just going to show three examples of equivalent exposures made by varying the aperture instead of the shutter speed.
Two Stops Underexposed
This is 1/500 sec. f/16. Compare to 1/2000 sec. f/5.6.
Right On
This is 1/500 sec. f/5.6 again.
Two Stops Overexposed
This is 1/500 sec. f/2.8. Compare to 1/125 sec. f/5.6.
Practice
This is much simpler to do than it sounds. Go out and play with some landscapes that will hold still for you. Go out on that hillside, set your camera to any exposure at all, and take a picture. Look at it on the LCD. If it’s too dark, adjust the controls to give one stop more exposure (remember, you have three ways to do that; use any one you want). Take another picture, and evaluate it. If your picture is too bright, adjust one of the three controls to give one stop less exposure. Take another picture and evaluate it.
When you think you’ve got it right, keep going. Make a few more exposures, continuing to change the exposure in the same direction, so you have some examples on the other side of correct. Take all these back to your computer and examine them carefully. Remember that your camera records the exposure you used in the EXIF information; you should have a program that will show you that information. For Windows, IrfanView is both a good image viewer and a good EXIF information viewer.
Spend 10,000 hours doing this under a variety of conditions, and you’ll understand exposure :-).
(The LCD is not a terribly accurate way to judge exposure, especially in daylight, but with experience you can learn to get useful data from it. If your camera supports displaying the “histogram” of the picture as well as the picture, use that mode, and learn to understand the histogram; that’s another simple article.)
Now step away from the computer, pick up your camera, go out there, and play with manual exposure!
