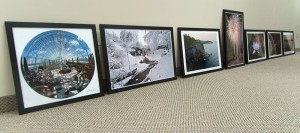
Framing is one of the most beneficial things you can learn to do yourself, if you’re an artist making flat visual art. Of course, if you’re a successful visual artist, framing is one of the first things you’ll want to give up!
Framing is important for artwork. It protect it from damage in storage, handling, and display, and provides some protection against environmental dangers.
Framing it Yourself
For an amateur, it’s very handy for gifts, and for displaying things in your own space. Commercial framing can quite easily cost $200 for a moderately large print, even if the framing is quite simple. And at certain (low) levels of professional print sales, I think offering a framed option helps deal with people thinking “but it’ll cost me another $250 to get this framed nicely”.
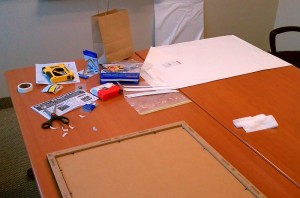
I started cutting my own mats in high-school, early in my engagement with photography. Being able to size the opening precisely for the particular image is very nice, especially when you want something slightly unusual. It also reduces the amount of stock you need on hand to cover sudden framing needs.
For years I rarely printed larger than 8×10 (from 35mm film, so grain started to get ugly much beyond that), and used metal-section frames. Those are relatively cheap, and can be bought in pre-cut sticks quite cheaply. So everything was fine.
Lately, though, with ink-jet printing and digital originals, I’ve been going bigger. Most recently, a set of 20×30 prints to go on the walls at work.
Commercial Decor Project
I’ve got 4 pretty decent results leaning against the wall near me here (4 more to print, 2 of them ready to go now that I’ve validated how they fit in the frames).
This is a commercial decor project, not a fine art project. Any semblance of concern for archival permanence is entirely an artifact of my personally juggling the options to do what I could.
Where we started was with a budget of $400. After some research I decided we could, just barely, meet the expenses of 8 images fairly large (I finally settled on 20×30). I began with the assumption that I’d do the framing myself, just buying components. The cost items I worried about were frame (including glass), printing the images, and matting.
Mats are nice. They let you hide any edge issues on the print itself, any crookedness, and they make it fairly easy to precisely position the print (which is basically taped to the back of the mat; linen t-hinges by preference). However, I had a fairly strong desire not to cut the mats myself, plus the boards cost about $8 each or so, significant on a $50/image budget.
The mat performs another very important function: keeping the artwork from touching the glass (and, especially, being pushed against the glass). Depending on atmospheric conditions, several people have reported photographic prints bonding to the glass in only three months, given a chance. Every professional framer I have talked to kind of cringes at the idea of putting the art directly against the glass. While commercial decor has less interest in archival permanence than fine art, 3 months is an order of magnitude or so short of what would be acceptable.
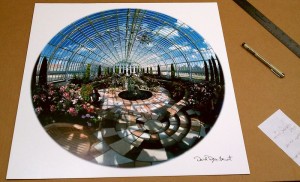
I learned a trick from a professional framer: skip the mat, just put a shim under the lip of the frame to keep the art work off the glass. They sell self-adhesive clear plastic spacers ($10 for 60 linear inches), or you can cut your own off the edges of mat board. I cut my own for this one. And bought glue dots to hold them in place (while I stacked the contents in the frame; once the frame is assembled, pressure will hold them in place). The glue dots were 1/2″, though, so I’ve been cutting them in half with scissors (before removing them from the backing paper). This is a pain; would you be surprised to know that the glue tries to stick to the scissors? No; me neither. Probably the 3/8″ dots would be better. They’re wider then the shims (and than the lip of the frame I think), but I could fold them over the edge of the shim to glue directly to the frame. Note that 8 20×30 prints is 800 linear inches of edge to shim (if I shim 100% of the edge)! I’ve used up 4 Exacto blades cutting the shims.
A print on ordinary weight inkjet paper, especially at this size, will probably touch the glass in the middle some of the time even through a mat. Unless you mount it to a board. But mounting to a board is expensive, a pain to do yourself (I don’t have a dry-mount press; spray adhesive gets everywhere, meaning you need a respirator, and is amazingly unforgiving if you want a borderless mount), and not a technique preferred by museum curators (it’s committing the safety of the artwork to the safety of the board and the mounting adhesive). However, touching without pressure is at least less bad. (I’ve got an alternate idea involving taping the artwork in tension to the backing board. Also not archival, but in fact ordinary scotch tape is pretty stable. Haven’t tried this yet, but it would cut the printing price significantly.)
I found an interesting option at Costco (which, jumping ahead, is the cheapest place I know to get quality inkjet printing at this size, though no larger). For only 2.5x as much, they’ll print on a Fuji “board” material. It’s much stiffer than paper, though not as thick or stiff as basic mat board. Furthermore, it’s more archival than the Fuji “satin” paper they have (it doesn’t have optical brighteners, the paper does; but neither has been tested by Wilhelm Imaging Research). This material has at least some of the benefits of mounting a print to board, without the drawbacks (except cost).
At this size, you want a wider border than the cheap metal-section frames. We found some inch and a quarter frames at Frameusa that looked decent. They were around $25 for 20×30 with acrylic plastic in the front, plus shipping. They’re not, of course, suitable for fine art—they’re made of particle board, in fact (plus the backing board included is brown corrugated cardboard). Mat black finish, which is fine externally (there are lots of other choices). The backing is held in by framer’s points driven into the wood. They came with the flexible points—don’t pull them out! You can actually bend those things flat to the edge to get the contents out, put the new contents in, and bend them back to hold everything. Not very many times, but once, twice, maybe three times. This is very convenient.
Finally, the printing itself. Digital originals, and I am definitely preparing the files myself. Printing big is harder than printing small—you’re enlarging more, so small things become bigger things. Sensor dust, or crap floating on the water in the lily pond, all get enlarged. I’m not going into any detail here—it’s too big a subject, and one I’m not ready to teach.
However, I can talk about suppliers and technical details.
I prefer inkjet prints, generally, especially in color. They’re more permanent than RA-4 photo prints (not than silver-gelatin B&W on fiber paper; but hardly anybody offers that from digital files, certainly not cheaply), require less care from the lab (no chemistry to monitor and maintain), which means you can use a cheaper lab, and are a closer match to my printer at home (which means my proofing at home is going to be closer to right). They are, however, expensive. Except for Costco.
Adoramapix will do RA-4 prints amazingly cheaply from digital files. And they’ll do them up to 24×36 inches. They make profiles available, that you can use for soft-proofing. I’ve seen results from other people’s photos, and they appear to be competently made (my friend, and I, don’t let the lab do anything, no color correction, no density correction, nothing; we do all that in our own file prep; one of the most important things is to get the lab to print the files AS-IS, with all auto-correction off).
And Costco will do 20×30 prints on Fuji satin paper or this Fuji board I’m using from an Epson 7800 (so it’s Ultrachrome pigment inks). They hire Dry Creek Phohto to maintain the printers, and make up-to-date profiles for them. I can get the profiles online, so again I have good proofing profiles to work with. Costco charges $10 for a 20×30 print, or $25 on board. Also, the board has a 1cm mandatory border, and they expect you to send them a full 20×30 bitmap image and they reduce it to create the border. I wish there were a way around that (at least the reducing).
I decided to do inkjet on the Fuji board; blowing half my budget right there. The other half goes to the frame. And no mat.
So some prints have been made, the frames ordered, other supplies accumulated. It’s time to assemble things.
Putting the Art in the Frame
This is all very specific to the exact materials and techniques chose.
First, you take off the shrink-wrap. Don’t worry too much about the glazing (thin acrylic plastic for these frames) at this stage—it’s protected on both sides by a peel-off plastic layer.
Now place the frame face-down on a clean table (or workbench; a clean workbench, right).
A digression on clean: one of my consistent frustrations with framing is getting the inside of the glass spotlessly clean. It has never yet happened. I strongly suspect it never will. One high-end framing operation in New York, however, has licked this problem, as described by Philip Greenspun in an early article on photo.net. Their secret? An integrated-circuit-fab-grade clean room they bought surplus from National Semiconductor. I do so admire a really over-the-top frontal assault on a real problem.
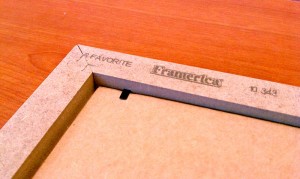
Next, bend all those framer’s points up flat against the frame (don’t try to minimize the bending, bend them all the way).
You should now be able to remove the (non-archival) corrugated cardboard backing. Now you see the big sheet of paper (with their log on the front) that the manufacturer ships in these frames. Take that out.
You’re now looking at the back of the sheet of acrylic plastic that serves as glazing in these cheap frames. (Acrylic plastic is not inherently an inferior choice for glazing in a frame; this particular acrylic plastic is thin enough to be, um, noteworthy, though.)
Well; actually, although it’s transparent, you’re sort of looking at the back protective sheet on the glazing. There’s a very thin plastic protective sheet on both the front and the back of the glazing, and it’s now time to remove them.
This is the riskiest (to the framing materials) stage of the process. It’s quite easy to scratch the glazing. In particular, the ends of the framer’s points will do the job very nicely, and they stick up above the edges of the frame in most places. (Guess how I happen to know this!)
Okay; so you take the plastic out of the frame (push it through from the front and grab a corner; remember, it’s protected now, so just grab it firmly). Note how flimsy it is!
Stand it up on one edge. I hold it against my body with an elbow (it’s still got the protective sheets on, remember, so you don’t have to be excessively careful) and use my fingernails to scrape at both sides of a corner until the protective sheets start to peel back. When they do, grab the one away from you, peel it back a good foot, hold the sheet up by the corner (you’re now making a bit of a fingerprint on one side of that corner that you’ll have to clean off later) and peel it the rest of the way off. Rest the edge of the sheet on the table, steadying it by the edges and against your body (the side towards you still has the protective sheet on it). Peel back a foot of this side’s protective sheet. Hold the sheet up by that same corner again, and peel off the rest of the sheet.
You are now standing with a sparkling clean 20×30 (plus half an inch each way, roughly) sheet of thin, fragile, plastic, with one dirty corner, waving it around by a very tight grip on that corner. Good luck.
So, grab the diagonally opposite corner, hold it flat, and lower it into the frame. This is where you have to be really careful to avoid scratching the edges on the framer’s points. Luckily the outer ¼” mostly won’t show anyway.
While you were waving it around, all the dust and paper scraps in the room have flown through the air and adhered to your sheet of plastic. Now that you’ve got it in the frame, you need to clean the inside. I followed their advice, and used water and a clean soft cotton towel. I don’t know what happens if you use anything stronger (like Windex, the usual choice). Organic solvents that would harm acrylic are, of course, right out. Circular polishing with the cloth removes drying marks from the water.
Decide where the bottom of the frame will be. Slide the glazing so it’s snug to the frame there (because that’s what gravity will achieve over time; might as well start it that way). Center it in the other dimension.
Now it’s time to install the shims. These are strips of mat board, cut narrow enough so they will be hidden under the lip of the frame. I cut ¼” strips off 8×10 inch stock. Longer strips would be easier to position, I think.
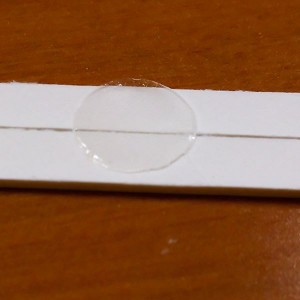
I cut a glue dot in half, stuck half the glue dot to a shim, and stuck it against the glass on the bottom. Repeat as needed, until you have shim around all the edges pretty densely. (The glue dots are acid-free. I’m only really using them to hold things in place until the back is put on; after that, pressure should hold things in place. I considered using museum putty for the same task.) I’m looking for a better way to do this; smaller glue dots would be great.
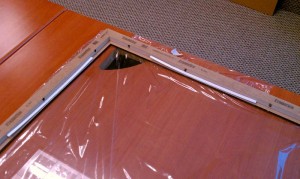
Check the glazing for dirt, and clean up what you find.
Now lower the picture, face-down, onto the shims and glass. Make sure you put the bottom where you decided the bottom should be, and that you don’t scratch it on the framer’s points.
Slide it so it’s solidly against the bottom of the frame, and centered in the other dimension (again, the goal is not to fight gravity; it’s so darned consistent, it always wins in the end).
Now the backing board. Slide it down tight to the bottom, and center it from side to side (same excuse as the last two times).
Now it’s time to start bending the framer’s points back. Start with two at about the 1/3 points at the top (this will tend to push things towards the bottom), then some in the middle on the sides, then the rest of the top, the sides, and finally the bottom.
When you bend them back, push them down (compressing the backing board some); you want things held in nice and tight.
If you damage any, or they don’t work, or your frames didn’t come with the flexible points, you’ll need a framer’s point tool. It’s basically a staple gun, that shoots the framer’s points.
When you’re all done, you still need to clean the front of the glazing. Try not to look too closely while doing it, you’ll just end up obsessing about the clearly visible dirt on the inside.
Put in the hanger gizmo in the middle at the top. I’ll make your life easier if you put it at exactly the same spot up-down on the top edge of the frame, because then hangers at identical heights will support their pictures at identical heights, making it much easier to make a “straight” line of pictures on a wall.
And you’re done. Wasn’t that fun? Good, we have 7 more to do.