Pancakes

I make a run at pancakes every now and then for the last few decades. This latest one has come up with a version that meets my requirements (which aren’t entirely mainstream), is so simple I do it from memory, and reheats well.

I don’t like “fluffy” pancakes; this recipe came from increasing the egg and milk and decreasing the baking powder in a standard recipe. It’s not much like French crepes, but it’s less fluffy, thinner, a bit chewier than basic American pancakes.

A single recipe is plenty for one person plus some leftovers, or two people who aren’t big eaters (or who are having the pancakes as part of a bigger breakfast).  And it multiplies easily; a double recipe is two big breakfasts plus some leftovers. By the way, in addition to the microwave, the leftovers can also be heated in a toaster.

Ingredients

  • 1 cup white flour
  • 1 tsp. baking powder
  • 1 tsp. sugar
  • ½ tsp. salt
  • 1 cup milk (I use 2%)
  • 1 egg
  • 3 tbs. butter (melted)

Method

Dump all ingredients in a bowl and mix with a whisk. Don’t beat to complete smoothness.

Doesn’t hurt to let sit a short while before baking (on a griddle). I use about ¼ cup per pancake, but any of a wide range of sizes work fine.

I cook these on a non-stick aluminum griddle across two stovetop burners. I set the burners at about 4 and 3 on a scale of 10, whatever that means. Between the non-stick  griddle and all the butter in the recipe, I don’t use any oil on the griddle.

So, the usual pancake thing; wait for bubbles to get quite common, some open, then flip the pancake.  Cook a little less time on the second side, and don’t expect it to look the same when done.

Variations

Leaving the sugar out has no effect that I can see. Leaving the butter out has essentially no effect that I can see.  Leaving both the butter and sugar out causes them not to brown much (and that’s why I leave the sugar in the recipe).

The quantity of butter is highly variable; I’ve doubled the recipe and not doubled the butter, and I see little effect. I’ve omitted the butter by mistake and had the pancakes come out tasting fine (though not browned; I didn’t have sugar in that batch either). In double batches I rarely put in 6 entire tablespoons of butter, it just feels excessive.

I haven’t experimented this time around, but I would be nearly certain that substituting oil for the melted butter would work fine.
Hash Browns

I kept seeing complicated recipes that would be more trouble than they were worth.  I eventually worked out a very simple one that I find  satisfactory.

Makes one large serving.

To make multiple servings, I’d use a larger pan, and I’d try making the patty thicker (cooking covered should cause the part not in contact with the hot pan to still cook by steaming).

Ingredients:

1 medium russet potato
1 pat butter
1T olive oil
salt and pepper

2016-01-14 12.38.33
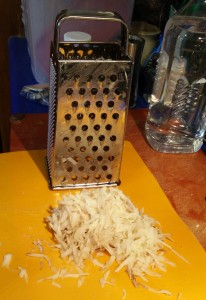
Grate coarsely

Method:

Scrub, remove eyes and anything else you don’t want to eat, and coarsely grate the potato.


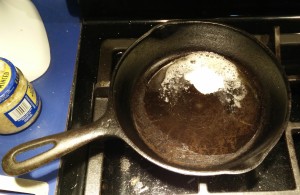
Butter should sizzle in pan

Pre-heat a cast-iron skillet of suitable size (I find 8″ works well for one serving). Must have cover. On my particular stove the cooking setting is #4 on the left rear burner, and I pre-heat at 6 or 8 because I’m impatient. I might call that “medium” heat?

Add butter to pan. It should sizzle a bit, right away, but not burn. Also add olive oil.

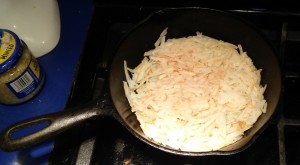
Flatten potato shreds in pan

Dump the potato shreds into the pan, and arrange them flat over the entire bottom of the pan.  Pressing down a little doesn’t hurt.


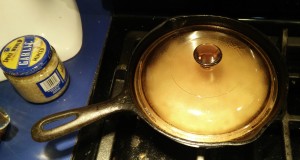
Cover and cook
Cover and cook

Cover the pan and cook for 5-7 minutes (depends on heat, size of potato, etc.).


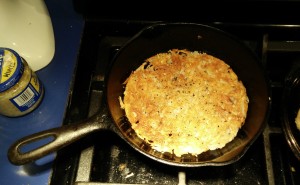
Flip the patty
Flip the patty

Flip the patty of potato. It should stick together well, not stick to the pan, and the bottom should be medium brown to golden.  Push down all over.

Grind some pepper and shake some salt over the cooked side.

Cover the pan again, and cook this side for 5-7 minutes. If you think it ends up too moist, omit the cover for some or all of the second cooking period.

You’re done.

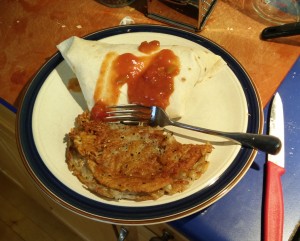
Serving suggestion
Serving suggestion


Basic Texas Chili

Mostly I prefer real chili (a bean and pepper stew with tomatoes and often meat ranging from beef to pork to turkey), but there are also uses for Texas chili (a beef and pepper stew without beans or tomatoes).

This is pass two at that.

2 dried quajillo chiles
1t ground ancho chile
1t ground arbol chile
2t ground cumin seed
1 finely chopped onion
4 cloves garlic finely chopped
1 lb ground beef (or something nicer)
1 cup beef broth
1 cup water
2T masa harina
2T olive oil

Toast the whole dried chiles for a couple of minutes each side over low heat. Remove seeds and chop into quarter-inch squares.

Heat olive oil in pan big enough to hold the whole mess. Saute onion and garlic. Add other spices towards the end. (Original recipe blends all the spices to a paste with 1/4 cup water. That’s actually beneficial in that the squares of chile skin are notable in the final dish my way.) (The use of whole dried vs. ground chiles was simply the luck of the draw in my spice cabinet today, not anything of artistic intent.)

Add ground beef and cook until brown, breaking up into smaller pieces as much as practicable.

Add water and beef broth, and bring to a boil.  Immediately reduce to a very low simmer (occasional bubbles) and cook uncovered for two hours.  Add water and/or broth as needed.  Towards the last half hour whisk the masa with water and stir into the mixture to thicken.

For some uses, you’ll want to thin it out considerably at the end.  Not so much for others (for example, you want it pretty thin for making home-made chili cheese burritos, but not for using in an omelet or “skillet breakfast”).


One Mug of Cocoa

Cocoa from cocoa powder, quantity one.  Half the normal sugar, partly because “normal” is too sweet, but mostly because I add a shot of creme de menthe or something to it usually and that adds a lot of sugar.

Recording it here because it’s annoying to deal with reducing recipes for such small quantities.

1T sugar
1T cocoa
dash salt
2T water
1c milk

Mix dry ingredients in sauce pan. Add water and whisk while heating.  Heat to boiling, boil for two minutes.  Then add the milk while stirring.  Heat to just short of boiling.

Add liqueur to cup (1 to 1.5 oz is often good).  Pour in cocoa.  This all neatly fits in all my mugs (in my big mugs it’s considerably less than a full mug).

There’s probably an even easier way in the microwave, but I haven’t worked that out (the timing is rather critical, and specific to the microwave).

Italian Bread

Gave up on the previous recipe. Went back to the Sunset Italian Cookbook adobe oven bread, that Pamela used to make and Mark Richards used to make at Finagle’s Freehold (my first house in Minneapolis). Have yet to have results anywhere near as good as I remember, but getting better. One problem was clearly old yeast (the old jar was a year out of date, and the new jar performed better; I assume letting it reproduce with sugar for a while before adding the flour would have made up the difference, though).

And have tried a few experiments, which I haven’t been that fond of.

So, here’s the current version. This is actually 1/2 the quantity of the original, sized for our mixer (I’m going to try increasing this by 1.5x to make three loaves, though). Instructions are detailed for my kitchen; you’ll have to adapt it to your environment, same as me.

Ingredients:

  • 2t active dry yeast (or 1 packet)
  • 2 t sugar
  • 2 c water at 110°
  • 5 c unbleached white flour
  • 1/2 T salt

Procedure:

Dissolve yeast and sugar in water.

In mixer (with dough hook) add salt and flour. Do not forget to add the salt! I find I have to intervene manually a lot to get it really mixed, including taking the dry scraps at the bottom of the bowl and burying them in the middle of the dough ball. (I’m starting to consider making a minor increase in salt, perhaps to 2t.)

Knead a minute or two in mixer, possibly adding up to 2c flour. (My experience has not yet involved adding more than ½c flour; perhaps in more humid weather?)

Form ball and put in oiled bowl. Cover with cling wrap and place in lower oven on “proof” (100° I believe; which is hotter than most recipes call for for yeast to rise; I’m considering trying a lower temp, but this one is very easy to attain with my equipment) for 75 minutes (until doubled).

Punch down, knead a bit (last chance to correct consistency), divide into two long loaves.  (Or you can make smaller rolls, etc.)

Shake yellow cornmeal onto ungreased baking sheet. Place loaves on sheet.  Cover with floured cloth. Place in oven on “proof” again to rise for 30-40 minutes. (Original recipe had cloth under as well as over, but I find handling the loaves that much is risky, so I’ve dropped the bottom cloth.) (I’ve tried a dual u-shaped pan which is supposed to make better crust, but it’s a very minor difference, and that pan doesn’t fit the upper oven either.)

Preheat oven to 350º. (I use the top little oven; but you could just take the sheet out of the oven and preheat it, wouldn’t hurt anything.) (I tried 400º, more in line with recipes in The Breads of France, but found it got too close to burning the bottom.)

Remove covering cloth. Slash the tops of the loaves with a sharp knife to release steam. Place in oven.

After 10 minutes, spray loaves with water.

After another 10 minutes, spray loaves with water again.

Bake for 40-60 minutes, until done.  (Total baking time is thus 60-80 minutes.)

Let cool at least 15 minutes before slicing (although, with a really good bread knife, you can get away with earlier).