The home fileserver is getting an upgrade. It’s reaching 90% full on the current disks, which is really about as far as it’s good to go if you’re going to upgrade (ZFS balances the load better when you add an additional vdev before the existing vdevs are too full).
Last night was step one (well, maybe step 30; counting all the consideration and research and ordering steps). I installed the memory upgrade, taking it from 1GB to 3GB (and filling all available memory banks), and then upgraded the swap space.
For what I’m afraid will be the last time in this series, I can report that it went completely smoothly. I remembered how to open the case (on this one, you release the tabs holding the front on at the top, tilt the faceplate down, and that gives you access to the screws holding the side panels), I didn’t break anything while vacuuming out the dust, I figured out which way the memory sticks went in, and they went right in).
Background on This Server
I think this hardware dates to August 2006. It’s running Solaris using the ZFS filesystem (which is why it’s running Solaris). It’s named “fsfs”, because it’s my redundant fileserver (all the data disks are mirrored).
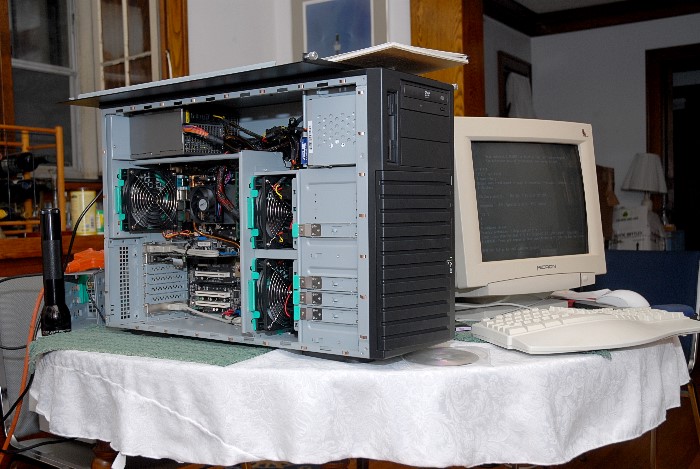
The hardware is a Chenbro case, actually a 4u rackmount with 8 hot-swap bays, but I’m using it as a tower. It’s very deep, since the bays in front don’t overlap the motherboard at all. ASUS M2N-SLI Deluxe motherboard with AMD dual-core processor. That motherboard has 6 SATA ports, so I’m not currently using two of the hot-swap bays.
Two of the bays are for the system disks (mirrored). The other 4 constitute the data pool. Currently this is two mirrored pairs of 400GB disks (two of them free from Sun, when they gave up on using anything that small in the Streaming lab).
While the processor is old, it’s marvelously adequate for what it’s called on to do; and the case was the expensive part. I don’t want to mess with it, and certainly don’t want to buy another hotswap unit at this level. So I’m upgrading this one.
Upgrade Plan
It’s getting new boot drives (2.5″ disks in a new hot-swap bay; you can get a 4-drive 2.5″ hot-swap bay that mounts in a standard 5.25″ bay), a new disk controller to give me 8 more ports, and new boot disks (in the 2.5″ bays, freeing two of the main 3.5″ bays for data disks).
The current plan of operations goes like this:
- Upgrade memory (completed)
- Update backups
- Update software
- Update backups
- Install 2.5″ hot-swap bay
- Install new 2.5″ boot drives
- Install new controller
- Install software (or transfer existing installation) to new drives
- Remove old boot drives
- Install a new pair of drives in the data pool
- Update backups
The new controller is to be the Supermicro UIO MegaRAID AOC-USAS-L8i. This needs weird expensive cable sets, but with the right ones, it’ll drive 8 SATA drives from something that looks like a SCSI controller to the computer (it’ll also drive SAS drives, handle port expanders, and generally do a lot of stuff, and Solaris supposedly has good drivers for it). This will be my first experience with SAS; we’ll see how exciting that is.
You’ll notice I’ll end up with 12 hot-swap bays (4 2.5″ and 8 3.5″). With 6 SATA ports on the motherboard, this means that I can split each mirrored pair across controllers, meaning that hardware failures and driver bugs can’t take out both sides of the mirror at once. There are still plenty of other single points of failure, including power surges, higher level software bugs, user error, and so forth; that’s why we still need backups.
ZFS
ZFS is the “zettabyte filesystem”. It’s a combined volume manager and filesystem, engineered from scratch. And in fact it eliminates all sorts of annoyances, and adds some big features. It was created by a team at Sun Microsystems (now a division of Oracle)
For me, the three big features are:
- Pool expansion
- Data checksum and scrub
- Snapshots
This server holds my photo archive, including scans of very old stuff. While I may not look at it very often, I do care about it. I have backups, and can restore if necessary, but a precondition to that is realizing it’s damaged. I could continue making backups and rotating them through storage and not notice a picture got corrupted for years, by which time the last backup that included it would be gone.
ZFS stores a checksum for every block. An operation called “scrubbing” goes through all the blocks and verifies them against their stored checksums. By doing this, I can discover early that something is damaged. If the damage is a disk error, the redundant copy on the mirror drive will be automatically used to fix the problem (if its checksum is correct). If there isn’t a valid copy of the data online it can at least tell me which file is bad, early enough that I should still have a valid backup. This makes me feel much safer. I think it even makes my data really somewhat safer.
Snapshots are great for keeping the last month or so of changes easily accessible online. Furthermore, I use snapshots on the backup disks too, so on only two backup drives I actually keep several years worth of change history.
Pool expansion lets me add more space without recopying everything. I’ve chosen to use mirrored pairs instead of RAID-5-style parity schemes (RAIDZ, it would be in ZFS). It lets me upgrade disks in smaller chunks (because in addition to adding a vdev to a pool, I can also replace the drives in an existing vdev with larger drives, and have that space become available). I don’t expect to ever have more than 8 hot-swap slots (well, 8 for the big drives I’m using for data), so working in small units, pairs, gives me more flexibility. I rather expect to stop at 6 data disks (3 pair) and put in a seventh “hot spare” that ZFS can immediately copy data to if something happens to one of the live disks. Using 4-disk RAIDZ vdevs, I would get a higher proportion of the drive space available for use, but I’d have no space for hot spares, and I’d have to replace disks in groups of 4, and I’d have less redundancy and hence more exposure to data loss (luckily I do keep backups).


